 First installed cedar shingle Nails are preferable over staples. Electro-galvanized, stainless or copper nails should be used to prevent corrosion and "bleeding". Ardox or ringed nails hold better than common shank nails. The nails should be driven 1 1/2" to 2" above the exposure line. There should not be more than two nails driven per shingle, regardless the of the width of the shingle..
There are two courses of shingles nailed on the bottom edge of a given plane. The starter course serves to fill the gaps in the first exposed course of shingles. The starter course should overhang the bottom of the wall or the facer of a roof by a minimum of 3/4" inch. The first exposed course of shingles should be flush with or, slightly over hanging, the starter course.
Each shingle must be gapped from the shingle beside it by roughly 3/16". This gap allows for expansion of the shingle and prevents the shingles from buckling as and if they gain moisture.
I find that if the shingles are laid from the edges of the plane to the middle, it is easier to find the shingle needed to fit make a neater job than cutting the shingles for the edges of a plane.
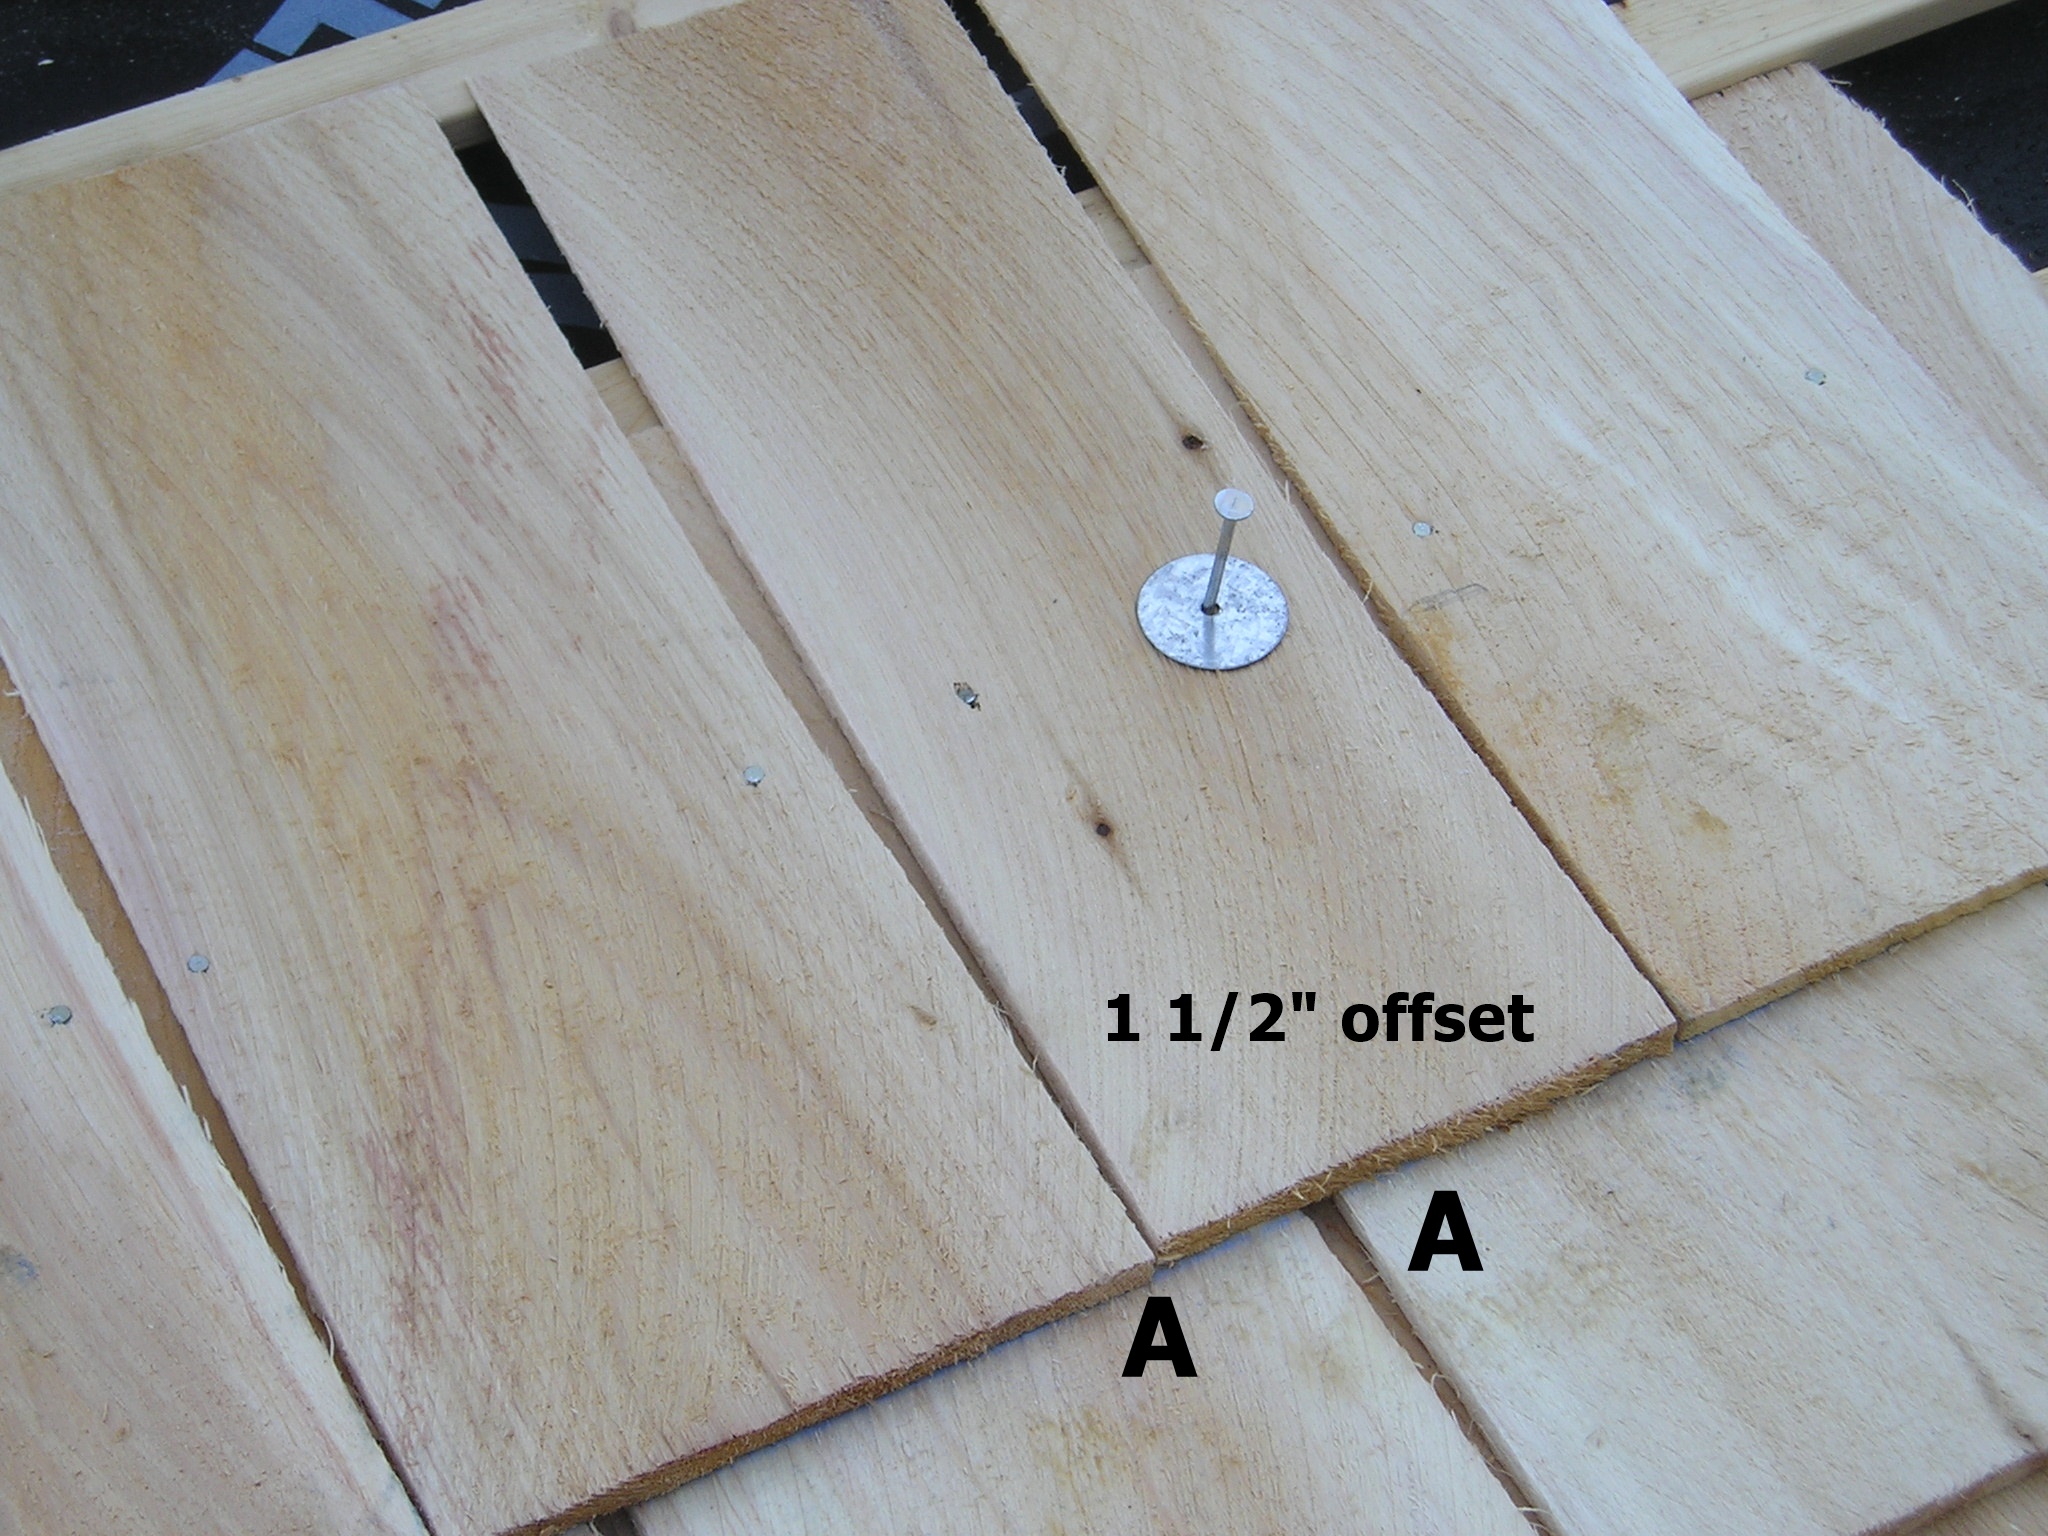 The joints in the shingles must be offset by a minimum of 1 1/2" on successive courses. The photo on the right shows this offset at point A-A.
 installing cedar shingles
The second course (first exposed course) is nailed directly over the starter course. Ensure that the second course overhangs the starter course slightly. Also ensure that the gaps of the starter course are whole covered by the shingles of the second course.
installing cedar shingles
The second course (first exposed course) is nailed directly over the starter course. Ensure that the second course overhangs the starter course slightly. Also ensure that the gaps of the starter course are whole covered by the shingles of the second course.
Use blue chalk to mark your reference lines. Red will not come off. In lieu of marking lines, you might choose to use a piece of strap tacked to the shingles at the exposure line for reference for the second course.
 finishing cedar shinglesFinishing off the plane at the top of a wall or roof is a matter of trimming back the shingles to fit. In the case of the photo on the right, the end of this end of this plane is a dormer wall at the top of the roof plane. The exposure line was marked as in the previous courses. The shingle being measured was placed butt up against the wall and the cut line is marked using the exposure line as a reference.